

Administration Management
The Administration module allows authorized users to manage team accounts, assign operational permissions, and audit system activities across the Evonet Merchant Portal.
Creating a New User Account
Follow these steps to set up a new user account and assign appropriate permissions within the Evonet Merchant Portal:
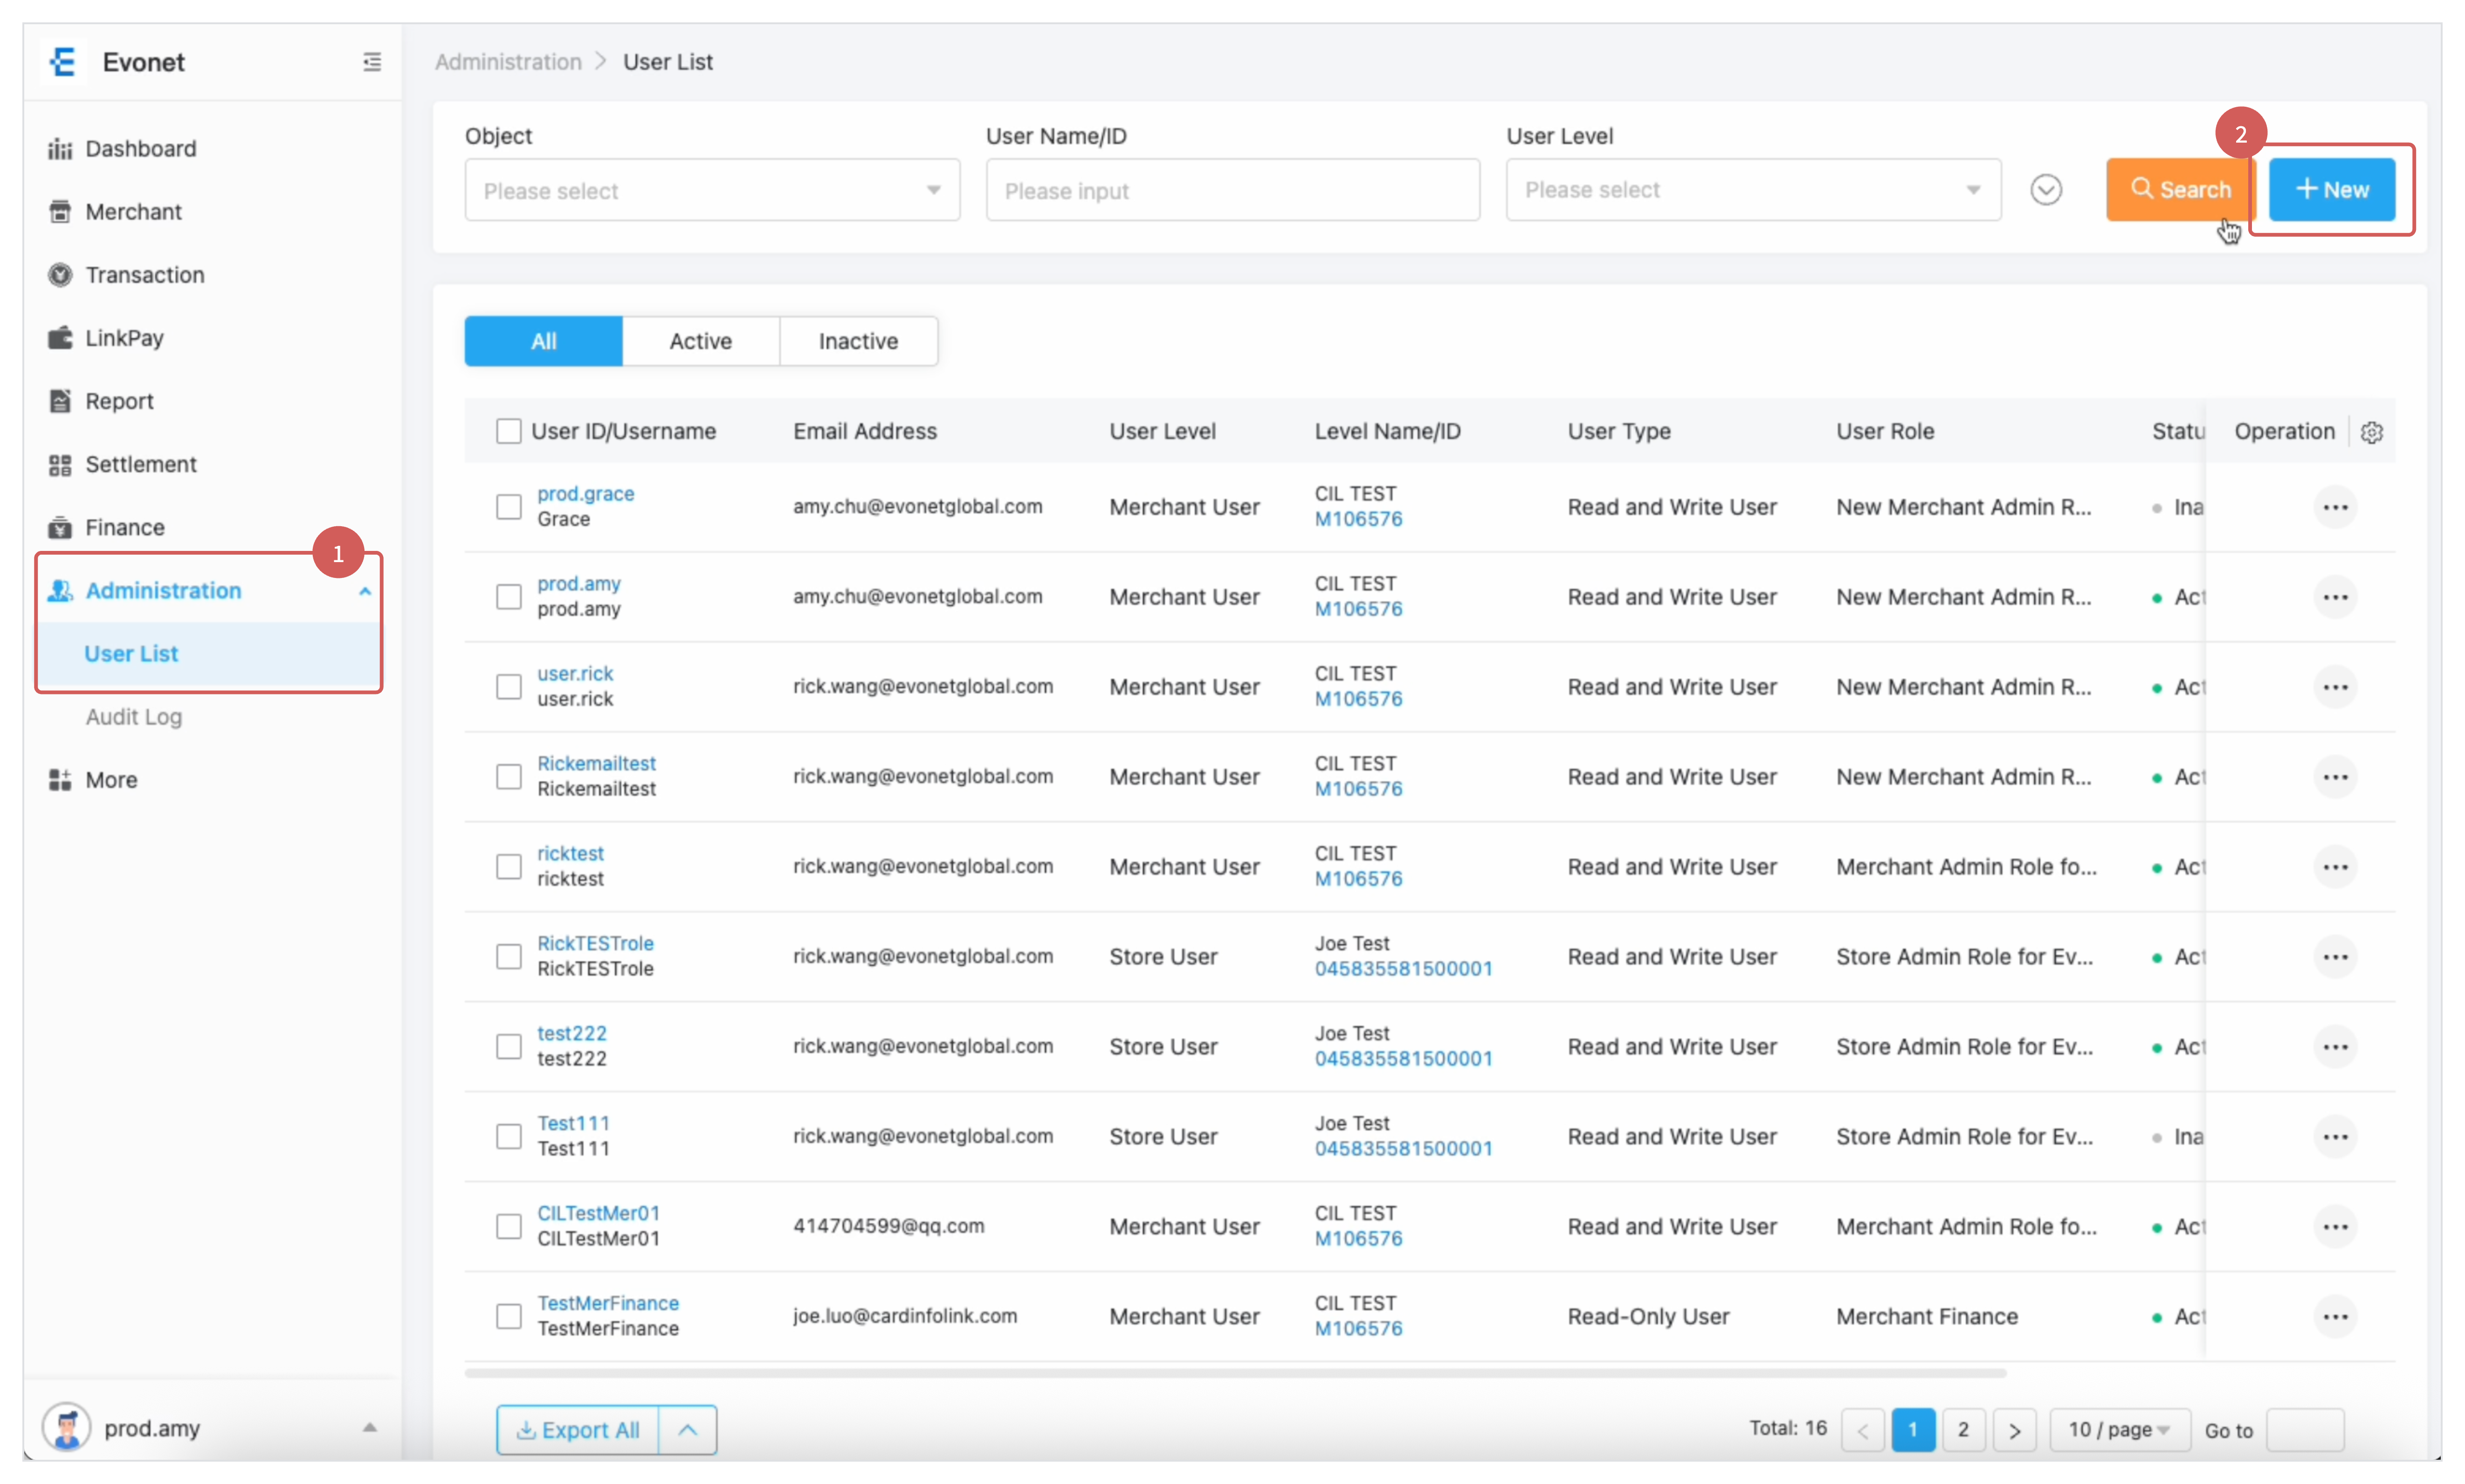
Step 1: Navigate to User List
-
In the left navigation menu, click Administration to expand the section.
-
Click User List.
-
On the top-right corner of the User List page, click the + New button.
Step 2: Select User Level
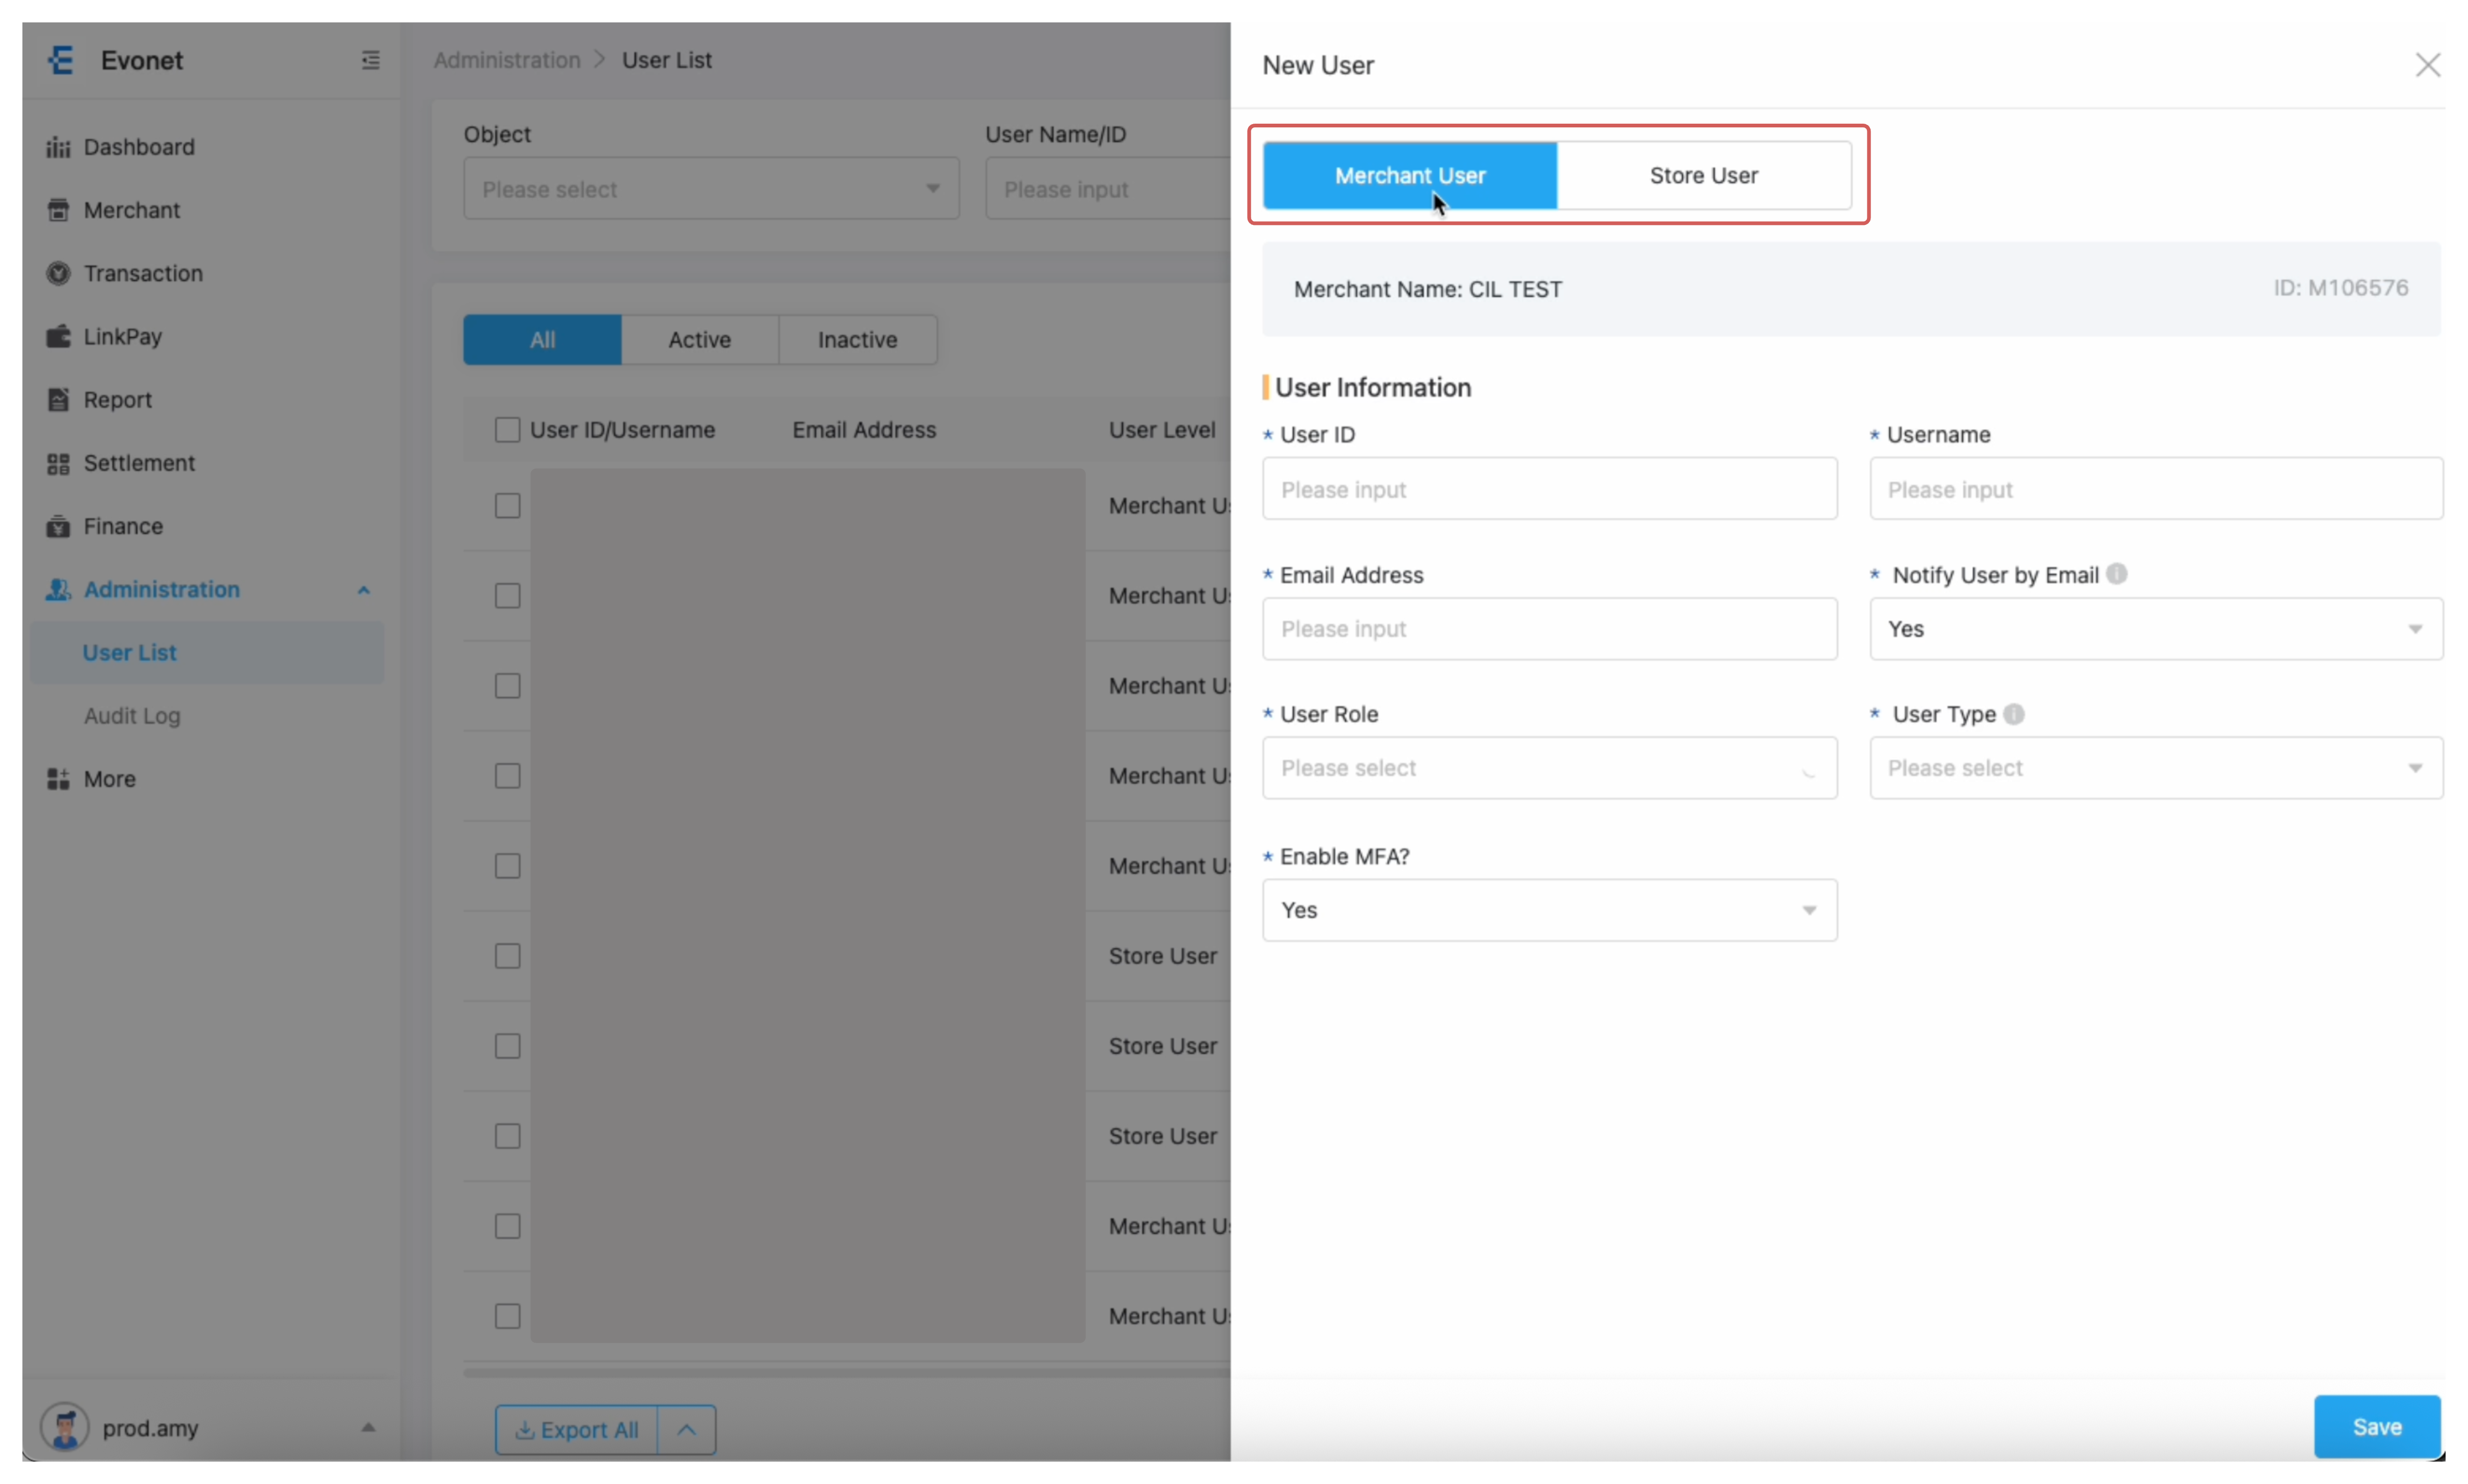
In the New User drawer that appears on the right side:
-
Select the account level tab: Merchant User or Store User.
Step 3: Fill Out User Information
Enter the required user details in the form:
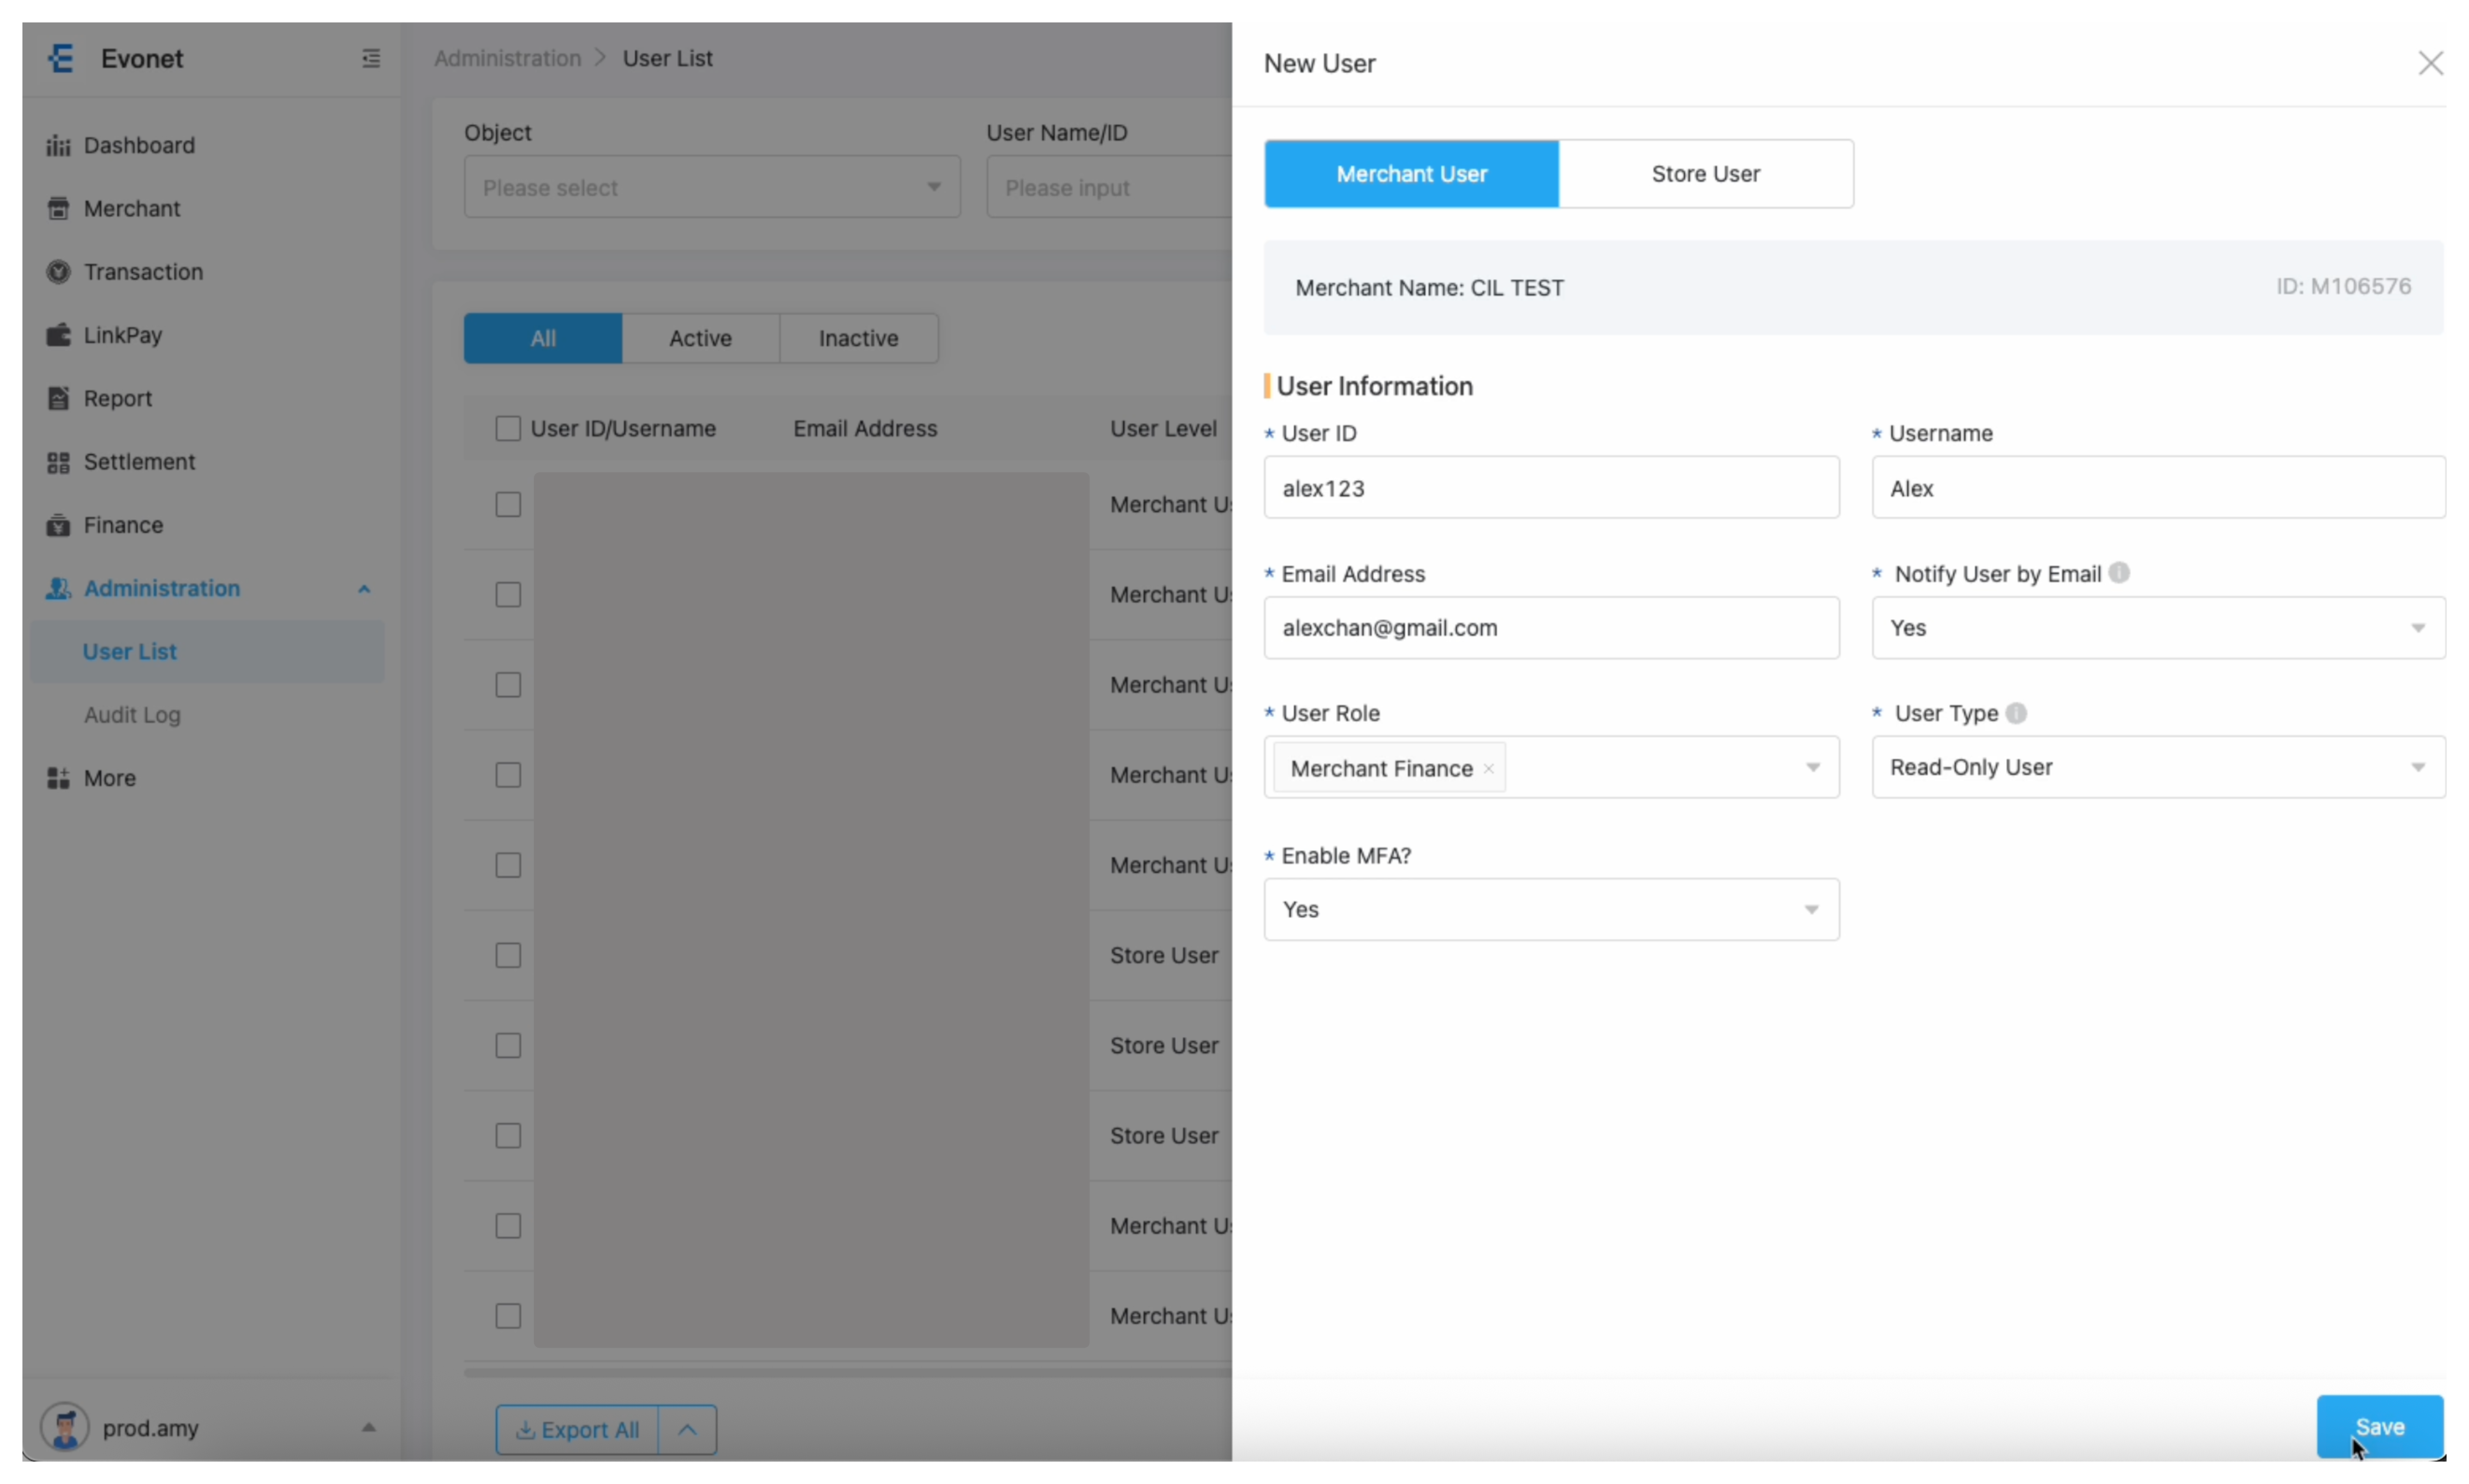
- User ID: Enter a unique account identifier.
- User Name: Enter the user's full name.
- Email Address: Enter a valid email for login and system alerts.
- Notify User by Email: Select Yes to trigger an automatic password setup email.
- User Role: Select the functional role (e.g., Merchant Finance, Merchant Customer Service, Merchant Business, Merchant Technology).
- User Type: Set operational permissions to Read and Write User or Read-Only User.
Enable MFA: Select Yes to enforce Multi-Factor Authentication during login.
Step 4: Save & Confirm
- Review all entered details to ensure accuracy.
- Click the blue Save button in the bottom-right corner of the drawer.
- The new user will now appear in your User List.
User List Overview
Navigate to Administration → User List to view and manage registered portal accounts.
Key Features & Access Rules
- User Visibility Hierarchy: Account visibility strictly follows your assigned organization level (Group > Merchant > Store). You can only view and manage accounts at or below your level (e.g., a Merchant user cannot view Acquirer or Group user accounts).
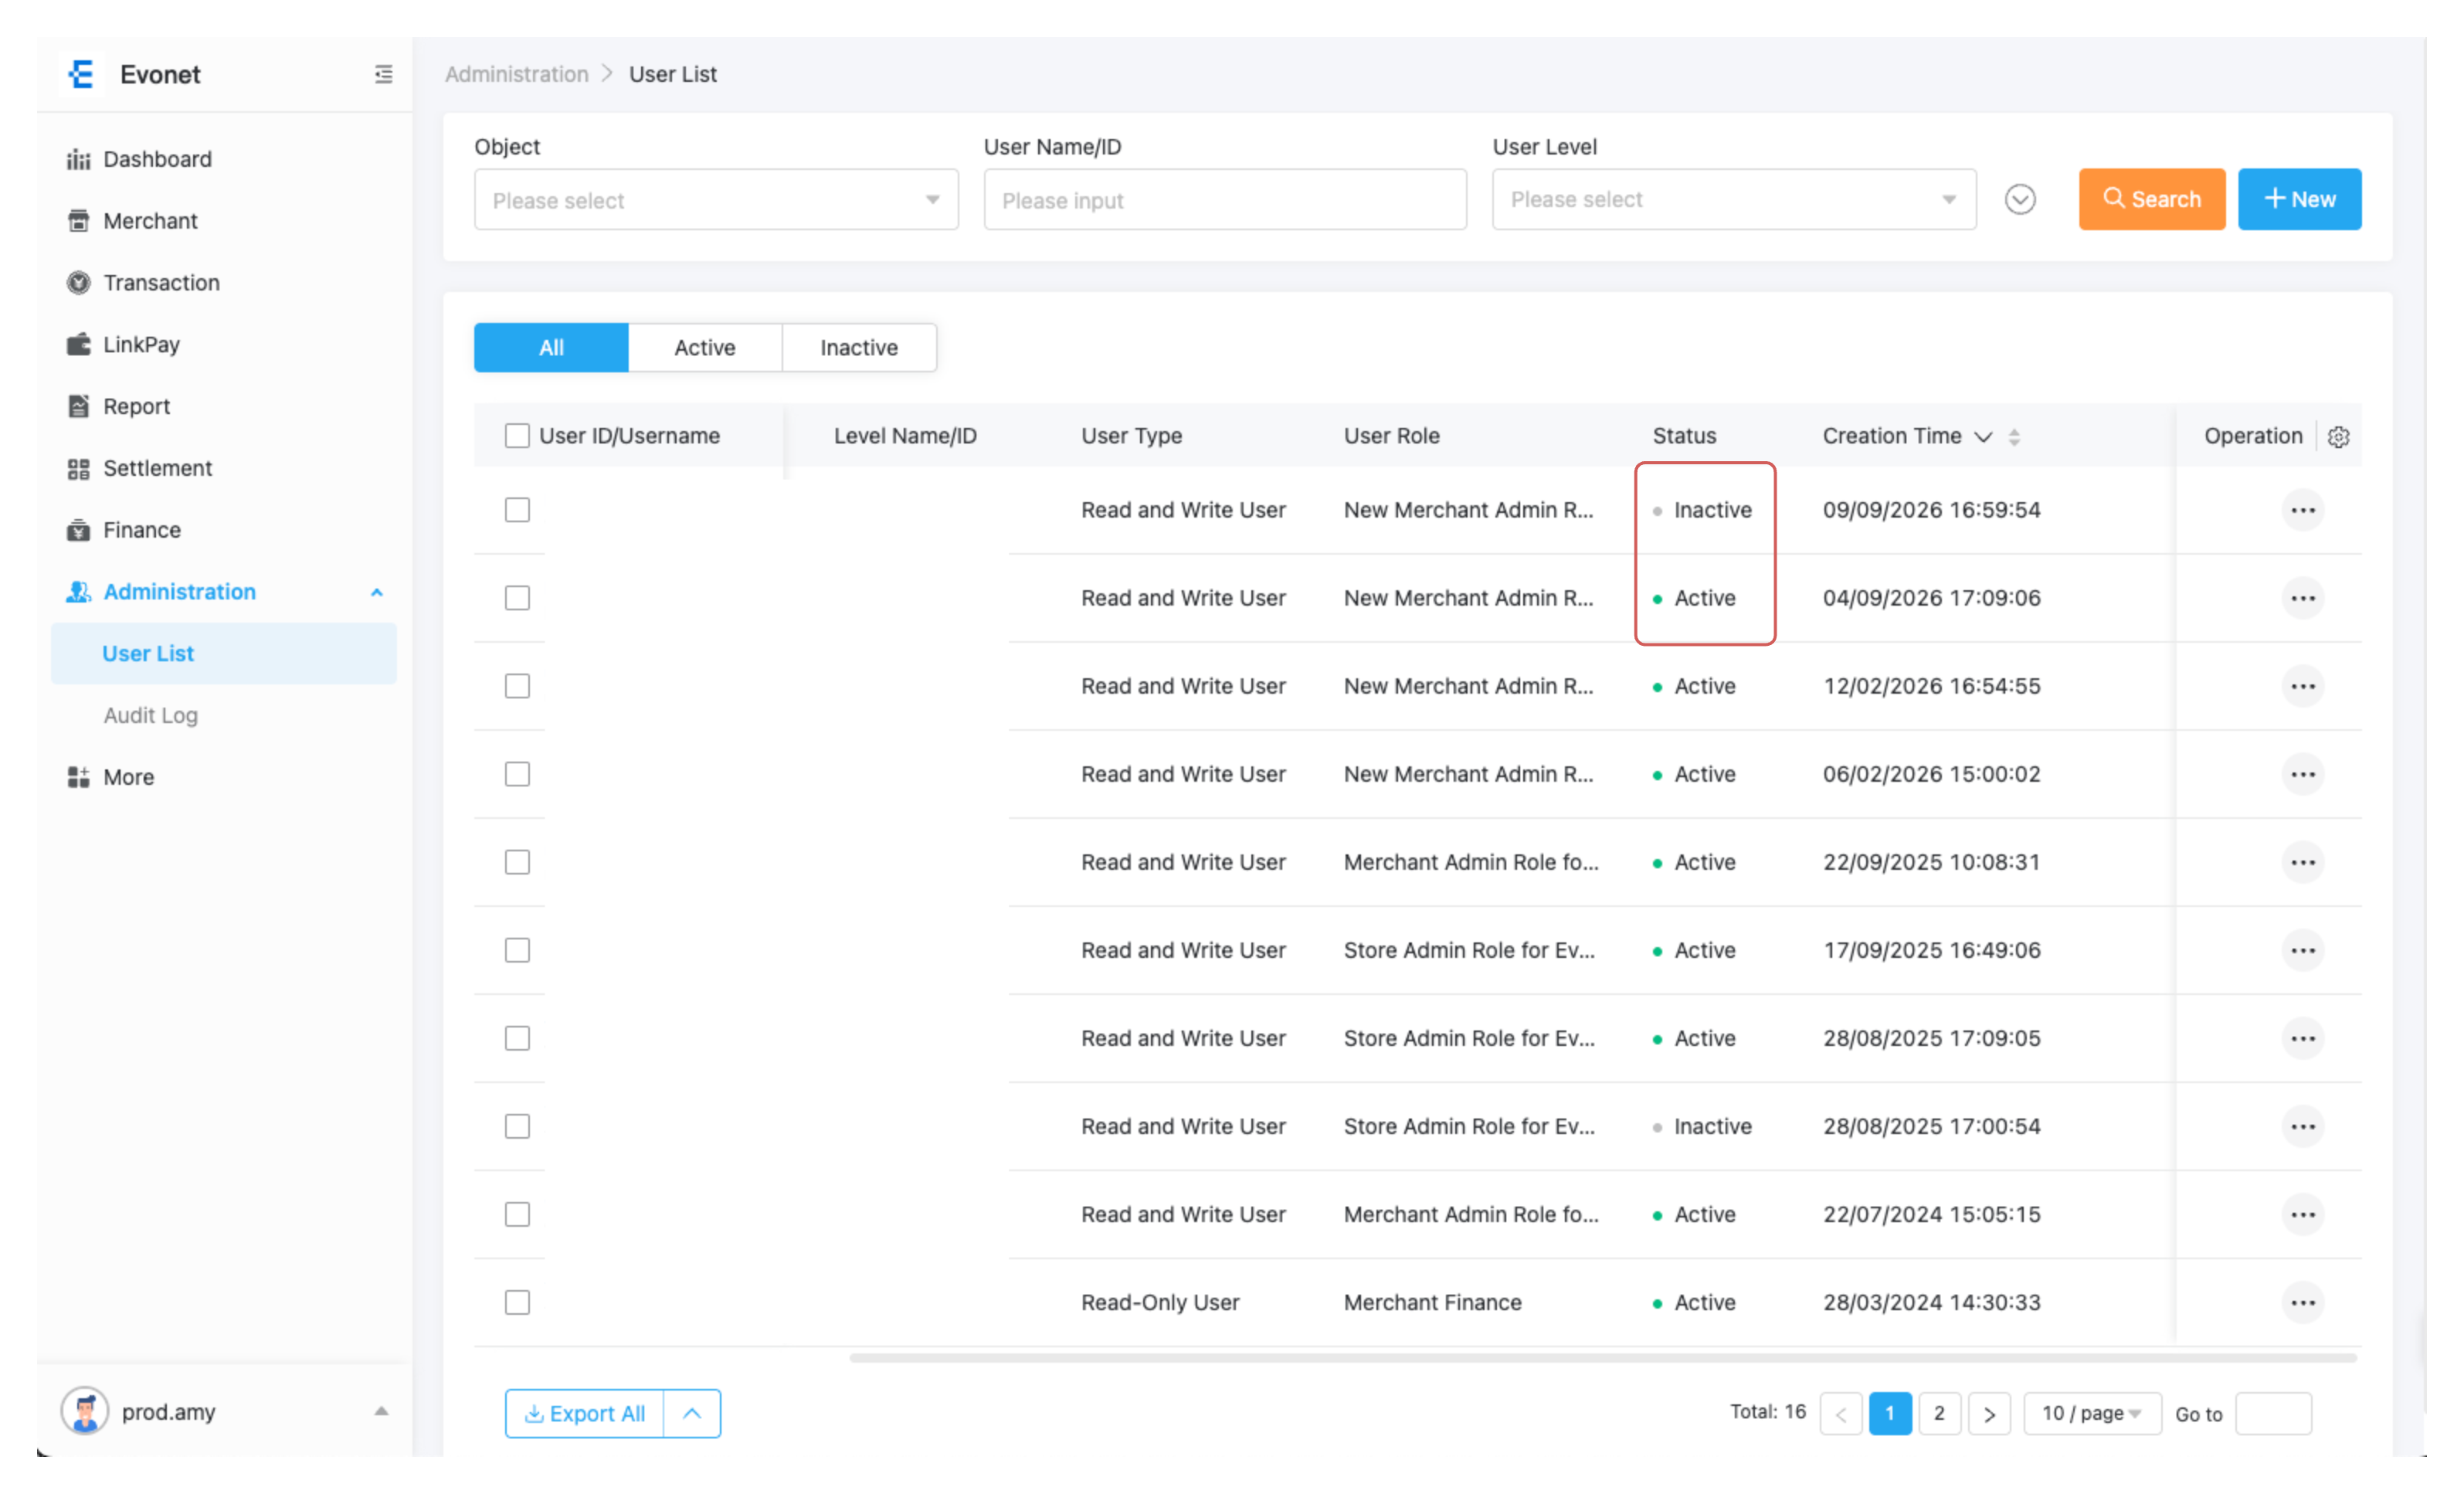
- Account Statuses:
- Inactive: Default state for newly created accounts prior to their initial login.
- Active: Status automatically updates to Active once the user completes their first login.
- Email Notifications & Password Setup: If Notify User by Email is enabled when creating an account, the system automatically emails an activation link to the user. The user must click the link and set a password to log in for the first time.
Managing Existing Users
Clicking on any User ID or Username opens the user profile to view details such as User ID, Username, Email, User Level, User Role, and User Type.
From the User List table, click Edit or open the Action menu (...) next to any user row to perform the following management actions:
- Copy User: Duplicate an existing user's settings and roles to create a new user quickly.
- Reset Password: Trigger a password reset email for the user.
- Reset MFA: Reset the user's two-factor authentication binding so they can pair a new device.
Audit Log
The Evonet system automatically logs all operational actions taken within the portal for security and compliance tracking.
Navigate to Administration → Audit Log to inspect system activity.
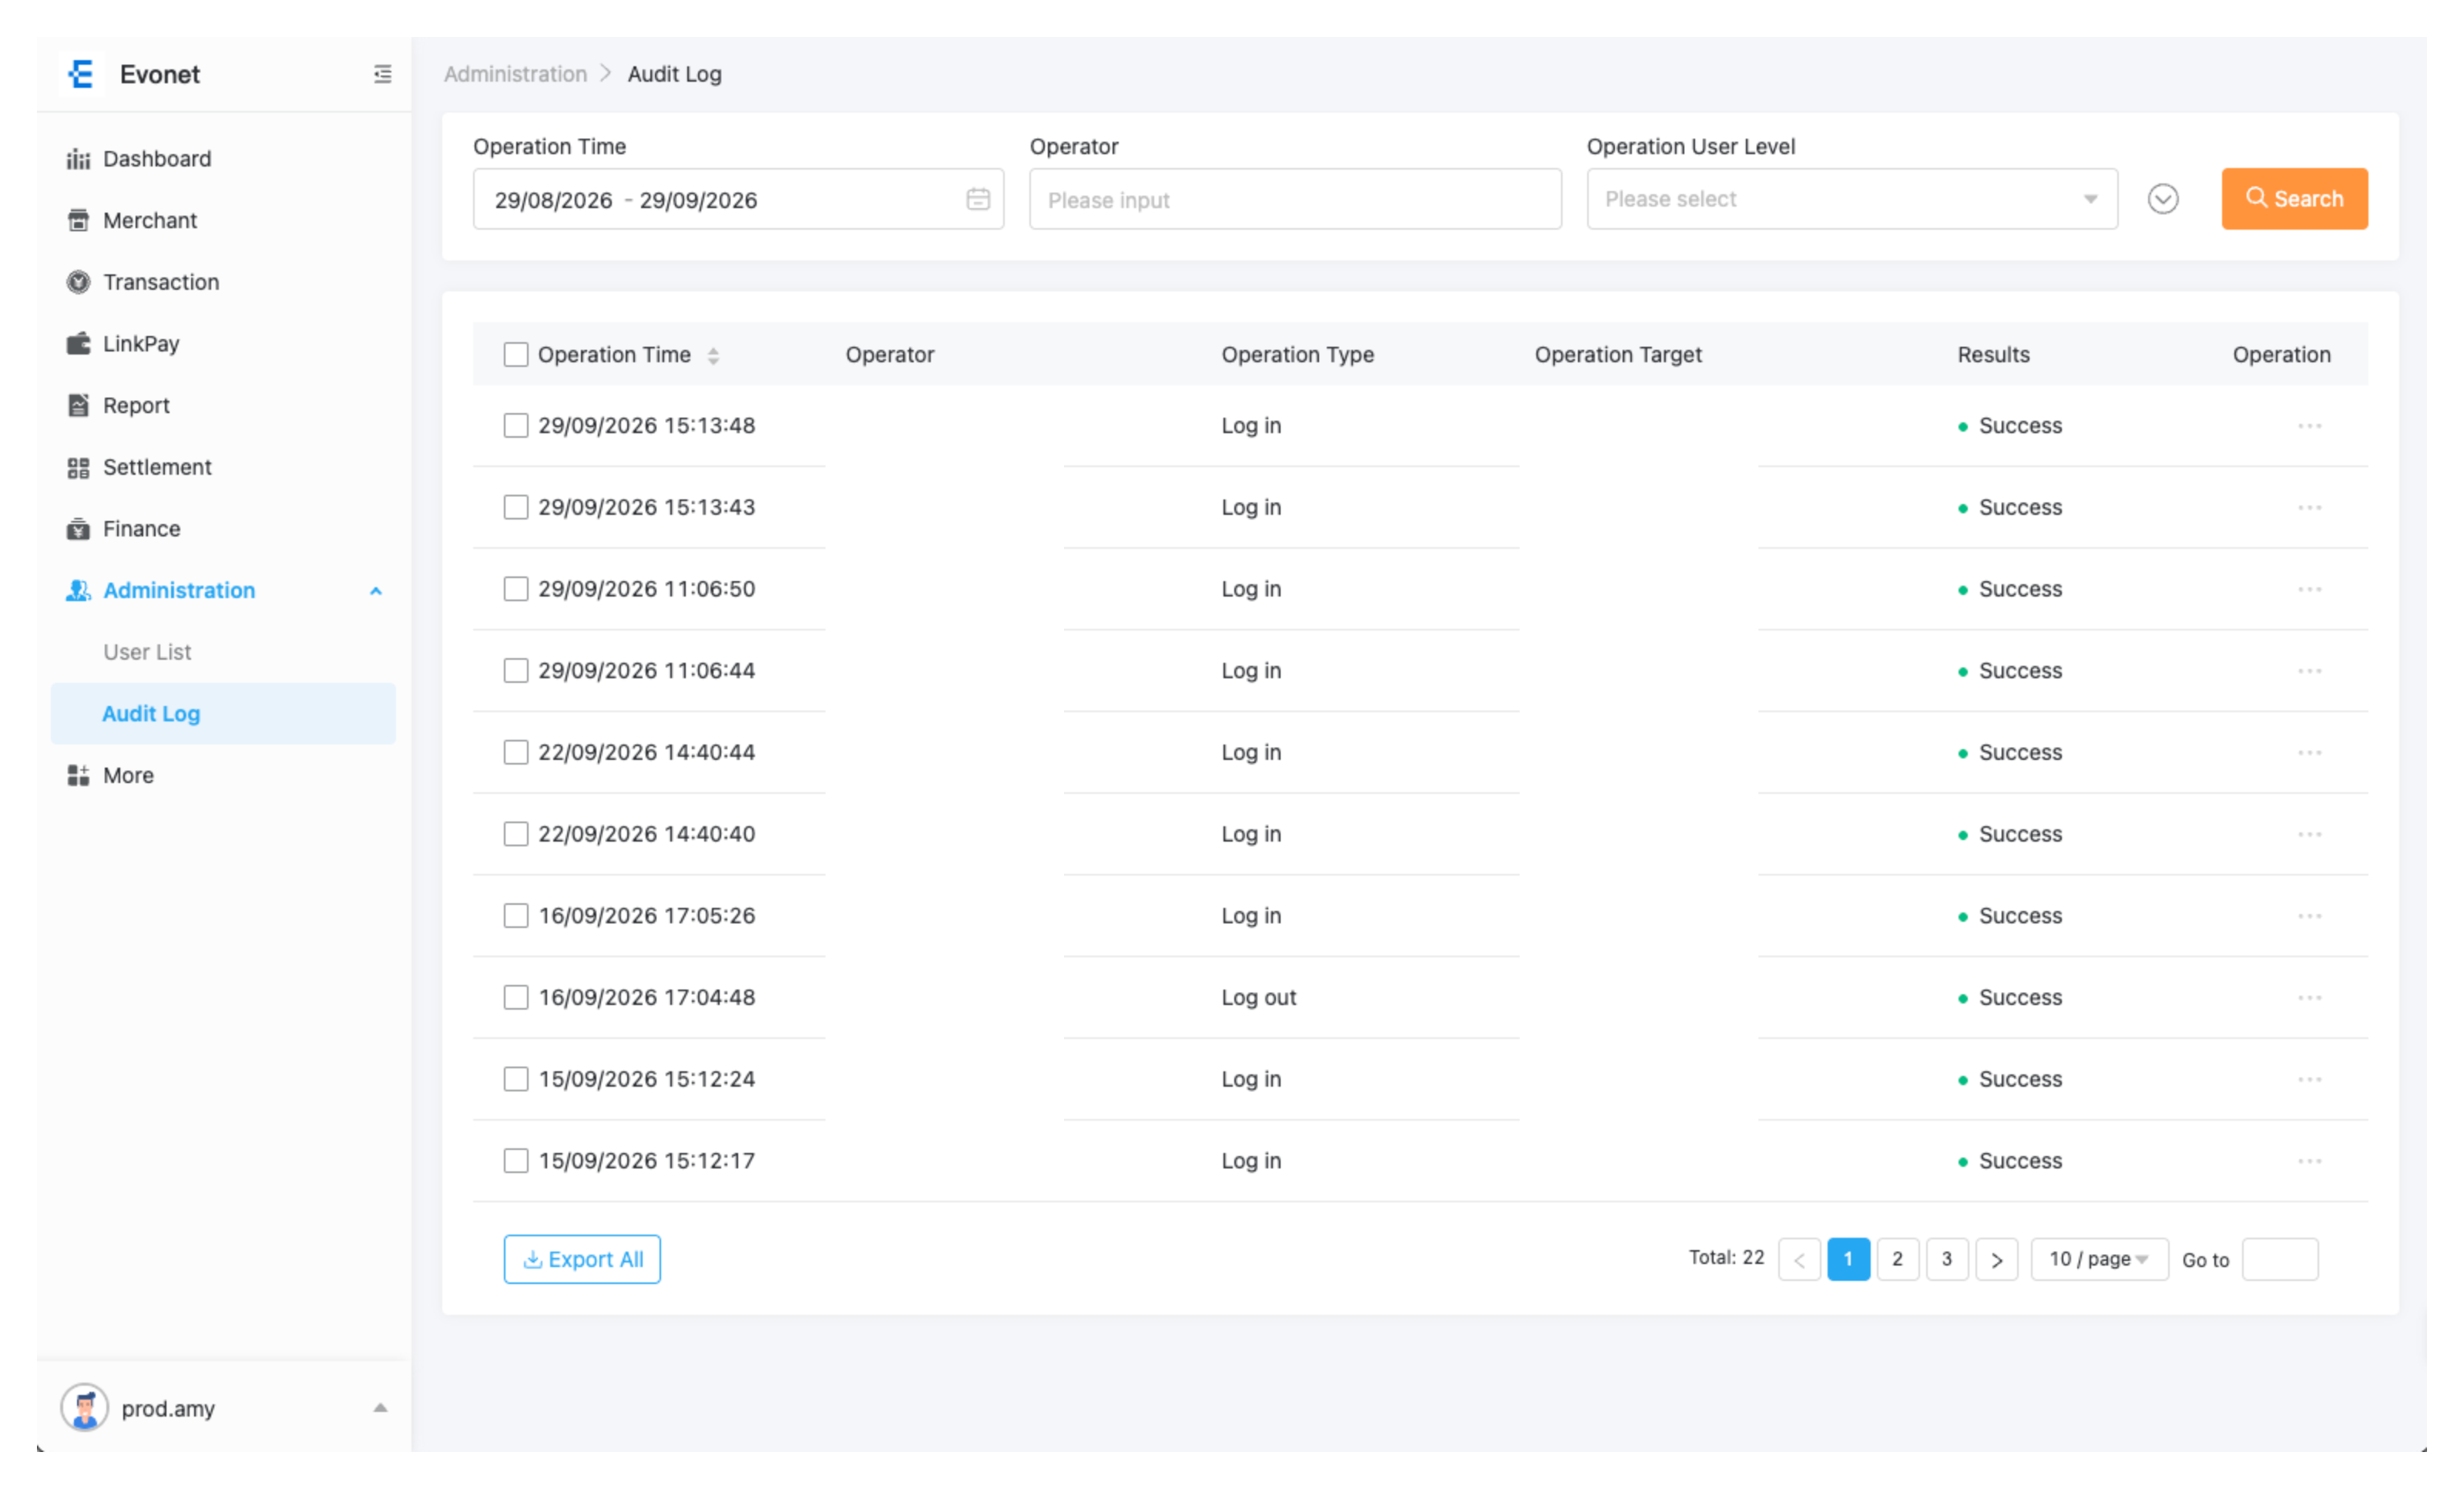
Every logged action records the following parameters:
- Operation Time: Timestamp of the action.
- Operator: The User ID/Name who performed the action.
- Operation Type: Category of action taken (e.g., Create, Edit, Delete, Export).
- Operation Target: The specific entity affected (automatically matches the selected Operation Type).
- Results: Outcome of the operation (Success or Failure).
Updated about 17 hours ago